Good evening
I am back once again with another project using the new decoupage papers from zero brand as a part of my project for Nagashri Arts. For those who have not seen my earlier post with the zero brand papers here's a little update.
These new papers are awesome. They are easy to use and have a beautiful texture on them. And though they are thick they are still easy to sand off or cut with hand.
I have for a long time being wanting to do some decor for my kitchen. And when I saw the beautiful still life with wine bottles, I knew I wanted to use that print.
Using a big sized chopping board. I first coloured the back and the sides with acrylic paint using 2 - 3 shades of brown. I used a sponge so as to get an uneven effect.
Then it was a matter of putting the paper on the area I wanted. I cut the top of the paper with my hand so that it blends neatly with the paint.
Using Modpodge, I easily stuck the paper and blended paint on the sides as well as the top. This paper does not have any bubbles or wrinkles while sticking.
Once my paper was stuck I cut off the excess and blended it a bit with brown paint and added a hint of gold. A bit of stencilling completed the project. Considering that this would be put up on the wall I have kept the back blank.
Here are some of the completed pics of the project
Hope you enjoyed this project
Wishing you a wonderful day
Good evening,
There are things that we use everyday and we continue using them even though they may be tattered or may have started looking old or shabby. It's usually the love or comfort that we feel with objects that we have had around us for years.
This is the story with my Mom's spectacle case. It's old and completely worn out but she refuses to give it up. She is very happy and comfortable using it. But I decided to give it a bit of life and add glamour to it.
As you can see from the pic below it's a black leather case from which even the leather has started peeling away
Thus started the journey of altering the spectacle case.
First of all I gave it a coat of black gesso. As the original case was black in colour I decided to stick to the black color. Another reason for this is the fact that it's an every day use item so it should not get spoilt easily with regular use.
After this, I decided to add texture by adding some gauze and again painting it over with black gesso. I did this on both the sides.
Once this was completely dry, I added some more texture on top with some stencils and modelling paste.
Thus my base was ready. Time now for adding in the embellishments. I have added some mdf embellishments, a few metal charms, flowers, rhinestones and some glitter balls and shaker elements.
Being a spectacle case I did not want it to have too much of depth and at the same time the working surface is small. Thus the design was simple and elegant.
I stuck everything using the 3D gloss gel. And once everything was properly stuck and dry, I went ahead and covered it completely in black.
Then I added sprays in shades of red, gold and copper. I have even made sprays out of the metallic paints in my DT kit which added a wonderful shimmer to the project . Between the coats of sprays I have lightly dry brushed with white gesso to lighten up the colours and have them pop out a bit.
Once I was happy with the colours I completed the project with rubbing in some Prima waxes in turquoise, red. Additionally I also rubbed some of the metallic paint in gold.
Here are some of the pics of the new altered spectacle case. And I must say my mom was super thrilled with the new look.
Hope you like this make over and do leave your comments and love below.
Good evening,
The brand zero has newly launched its speciality decoupage papers. And as soon as I received them I was ready to check them out and work with them.
First of all I checked the papers in detail. And I must say I was super happy. Most of the prints have an elaborate background design as well as well placed focal images. The printing is crisp and the paper is beautifully textured.
I decided to try them out on coasters. Many of the papers are specifically designed for smaller projects. And with a set of six patterns on a single page it's perfect for coasters.
Considering they are thick papers not much priming has to be done on the surface. I painted the sides and the back with brown paint. And I was set to go.
These papers are super easy to use. Just stick them with Modpodge and you are done. There are no issues of bubbles etc. And though the paper is thick I was still able to sand down the edges easily.
So with minimal efforts a set of coasters is done. To complete the coasters, I did stencil a pattern in the back and added some gold in the sides and on top as a slight shimmer near the edges.
And voila we are done. Here is the images of the final coasters
I do hope all of you try these papers. And here hoping for more beautiful patterns and papers from zero brand.
Wishing you a wonderful day
Good morning,
This is another project that I had created a few months back as part of my Design Team member with Nagashri arts.
At the beginning of every year, we all make resolutions and goals. Also we have planners and calendars to ensure we are able to write down our goals and targets.
I had always wanted a desk calendar for my crafting table. But at the same time something which would last me for beyond a year. As I knew I would not be able to discard it at the end of the year. Thus this year I decided to make one.
The inspiration for making this has been a lot of calendar blocks made of wood that can decoupaged. There are a lot of patterns in wood bases available on Pinterest as well as Google Images.
But to find wood and have a stand created would have been a time taking process. Suddenly it occurred to me that maybe it can be done with some paper and some chipboard pieces (basically scraps from earlier project)
I decided to give it a try and see how it's turns out...
So here is how I went about creating the blocks
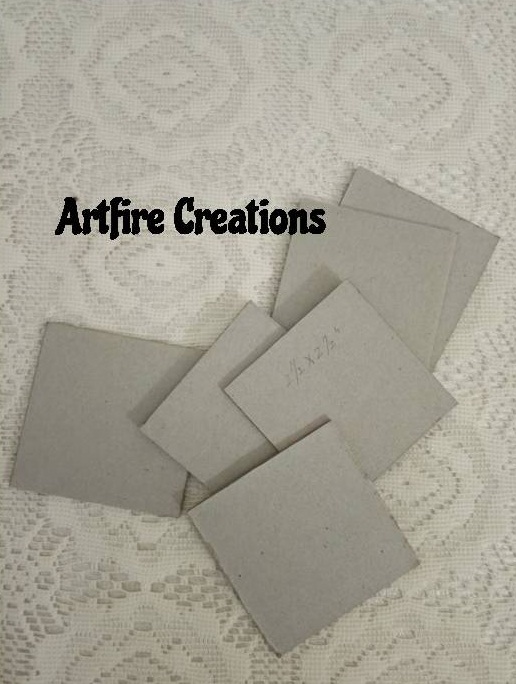
1. I wanted the blocks to be a bit big so that I could have the dates in bold. Each of the blocks requires 6 square pieces. This keeping it at 2.5" by 2.5" I cut out 12 such pieces.
2. Taking a piece of cardstock I stuck the pieces in a formation to get a cube (pic below)
3. Keeping half an inch margin for sticking the paper I cut off the excess. I also cut the corners for a neat fold ( As in the pic below)
4. Now the four pieces in a straight line will be stuck together to create the four sides and the other 2 pieces at the top and the bottom. This my cube is ready.
5. I constructed the stand in a similar fashion with the height being 6 inches and the breath being 5.5". The width is about 3 inches.I have kept the breath at 5.5" as the total space taken by the cube would be around 5" together.
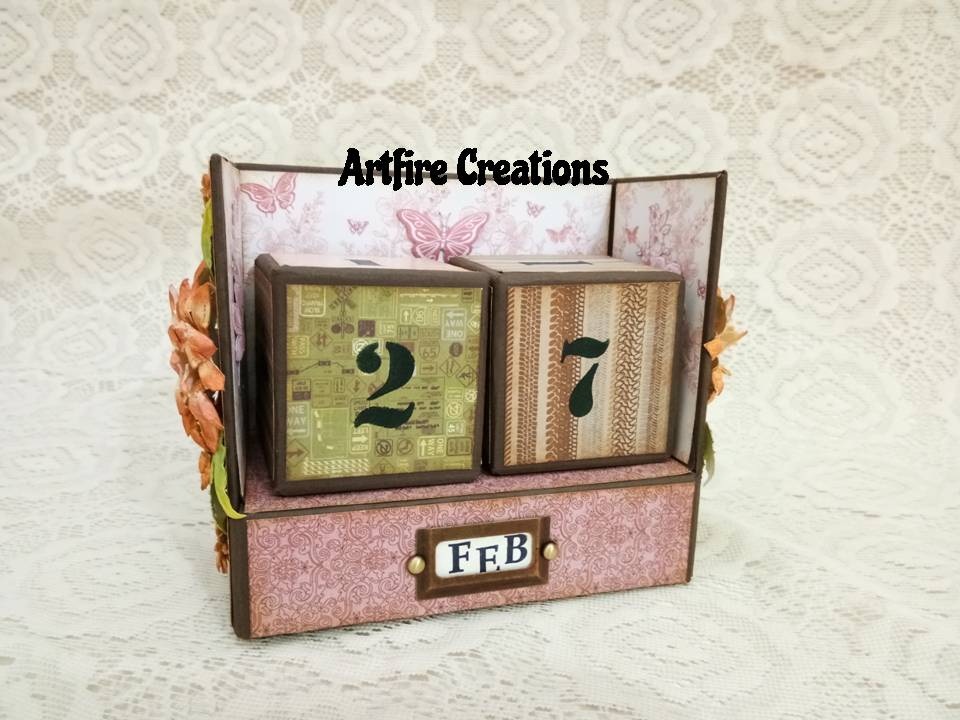
6. After the box was constructed all I needed to do was use a beautiful pattern paper and cover it. I have used the Time collection and have selected a variety of colors as I did not want to stick to a particular color combination. Thus each side of the blocks has a different color and pattern.
7. Each of the blocks was stencilled using a number stencil. The number placement on the blocks is as follows
Block 1 - 0,1,2,3,4,5
Block 2 - 0,1,2,6,7,8
(Number 6 doubles as number 9, so I was careful with paper being selected for that particular side)
8. After my blocks were ready and the stand also covered with pattern paper, I creates some tags for the months and put them on the in the metal label bracket. The other months tags are stored in a pocket at the back of the stand. This ensures that I can easily take out and change the month as and when required.
9. Lastly on the sides I added some handmade sunflowers to add a bit more beauty and colour to the project. I have used archival inks for colouring the flowers. I did not want to add any space for notes etc as I wanted this to be just a calender stand. (though a area for post it notes or pockets can also be done on the sides)
I did initially plan to add another tag on the top for the year but then decided to do away with it... That is an option if you wish to make this.
There are a few pics of the completed project. (front and back)
Hope you enjoyed this project
Wishing you a wonderful day ahead
Good morning,
It's so much fun to give a new look and life to an old object. This is the basis for today's project and inspiration which I created as a Design team member for Nagashri Arts.
My husband has had this old box which he uses for keeping his watches, wallets and knickknacks. It something that has seen a lot of years and thus a bit worn and bent in areas. Even though it's worn he just refuses to give it up.
So I decided to alter this box using leather paper, some decoupage and mix media.
The lower part of the box has been reinforced with chipboard to give it more strength and has been covered with leather paper and pattern paper. Also I have added a magnet with a washer as a closure for this box.
On the inside of the lid I have decoupaged a script pattern paper and then have decoupaged a variety of tissues to create a collage. This collage represents his professional life as well as his interests. Thus it's a mix of a lot of tissues.
The lid of the box has been altered using mix media techniques. As the box had fabric covering it - it already had some texture to it. I added some more texture using stencils and modelling paste.
I have used some cardboard and half pearls to create the look of the hull plates of a ship. Added to that are many pieces of junk like nails, old keys and some buttons from his uniform. I have also added some metal and mdf and other embellishments from my DT kit and some sea shells from my stash. And my composition was complete.
After applying black gesso to the entire surface, I let it dry completely before starting to colour it. I have used paints in grey, blue and gold in dry brushing technique. Also have used sprays in blue and green to add to the effect.
Finally I have added Prima waxes in blue and purple in certain places to complete the look.
The trim on the box lid is also black leather paper thus giving a nice finished look to the entire project. The project does have dimension, but not too much as this box will be used everyday, and I did not want the embellishments to add too much weight or come off over a period of time.
Here are some pics of the completed project
Hope you have enjoyed this transformation. Do let me know what you think.
Wishing you a wonderful day
Good morning
I do hope you have enjoyed the last post. Apologies for the delay in posting this here. I am back here with another project that I did as a part of being on the design team for Nagashri Arts.
Recycling is becoming a big thing. The rate at which we use and throw things is growing year by year and not a lot of waste is recycled. Thus it becomes our responsibility to contribute to keeping our environment clean...
One of the most common things we dispose are bottles - be it glass or plastic. Thus I have decided that I am going to try recycling as much as possible. And I started with glass wine bottles that I had.
Here is how i went about altering them....
The most important thing to do before starting any project is to clean them...
So, in went the bottles in hot water to clean them and remove the labels. Once the bottles were cleaned, they were ready for my art work. Here I have worked on two bottles using two completely different techniques.
Before I started on the bottles I applied gesso on both the bottles.
On the first bottle, I applied folkart paint in grey color. Then I went ahead and applied single step crackle in some places. I applied very thin coat so that I achieved very fine cracks. I then covered the entire surface with an off white chalk paint for the Matt look. This gave me very fine cracks in some places around the tissue.
Using Modpodge I adhered the tissue. Then the bottle was distressed with brown archival ink and some gold paint and some stamping. Splatters in grey and gold were added for extra effect and completed my bottle. In the end I have also added some jute cord painted in gold around the neck with a metal embellishment.
On the second bottle I adhered the tissue with Modpodge. Then I went about adding texture to the rest of the areas and even on corners of the tissue. To give extra dimension I added texturing on top of texture to create added interest. In areas texture was created using a simple 3D outliner. Once everything dried up, I have painted all areas in shades of green and brown using a sponge. I completed the bottle with hints of gold and some stamping.
Hope you like these inspirations and give this a try. And I can assure you that it's addictive.
Here are some pics of both the bottles together...
Wishing you a wonderful day
Good Afternoon, I am back today to share something absolutely new. Its a new product called leather paper. It's new for me, though some of you may have used it earlier. And this again is part of my experimentation with new products as a part of the DT for Nagashri Arts. When Nagashri sent a whole bunch of leather paper sheets to me I was quite unsure what to do with it.I had never worked with these before. But on first look, I was an impressed with these, especially with the texture. It not only has a textured look but you can also feel the texture.
So the first project I have done with these are a set of decoupaged coasters using leather sheets. And I was super impressed with this paper. It's is super easy to work without any tearing or bubbling or wrinkling.
The inspiration for this project is a lot of leather work that I had seen when I had gone for a holiday to Rajasthan. There I had seen coasters with stonework and leather/wood holders. Taking the same concept I have tried to give the holder a leather look with rims of gold. Here are some pics of the completed project.
Supplies used Leather sheets CoastersGerman NapkinModpodge Acrylic paint Archival ink for distressing Metallic paintVarnish
Hope you have enjoyed this project.
Good Morning,
I am here again with a project on decoupage. This post has been done as a part of my DT tutorial for Nagashri Arts.
By now you would have guessed that I am completely obsessed with this art form. And rightly so, because this is one craft form which is so versatile.
One day while opening up a bar of soap, I wondered about whether a humble soap can be decoupaged. It's white and has a smooth surface and though the surface is small, small projects can still be done. A quick search on the web and some books made me realise that it is possible to do so.
The next major question was would the soap be usable. No point in decoupaging a soap which cannot be used. So as an experiment I decided to do one soap and use it to see the results. And I was amazed. Not only was the soap usable but it also increased the life of the soap. And the image remains till the soap lasts.
And since then, I have be decorating all my soaps much to the amusement of my hubby.
Here are some pictures of the soaps that I have recently done.
Now coming to the procedure of doing decoupage on soaps.
1. Take a bar of soap. Ensure its smooth and does not have a logo or image engraved.
2. Select image to fit the surface. Try using tissues with a white background. The image needs to ripped and not cut and we will be using only the top layer of the napkin
3. Add a thin layer of mod podge on the surface of the soap. While the glue is still wet gently put the tissue on the soap. Note that you are gentle yet firm while putting the tissue. Do not put too much pressure as you could damage the surface. Also note your brush needs to be completely dry in this process.
4. Wait for the glue to dry completely. Add another 3 layers of glue on top of the tissue (drying between each layer)
And your decoupage soap is ready to use.
Supplies used
Soap
Decoupage tissues
Modpodge
I hope you do experiment and try this out